photo Logo_JLC_small_zps4cfd28fd.png

About Me

My Photo
I am a simple person believing in simplicities of life. I love crafting and experimenting all sort of crafts- some I succeed and some come out to be total disasters...:P but i still love them all. I attempt to share my creations and crafty knowledge with you all and hope you enjoy your stay at my blog. Love all, Hate none is my way of living. If you like my work and wanna talk about it, I can be reached at justlovecraftsblog(at)gmail.com xx

Won Itsy Bitsy Tricolor Challenge

Won Itsy Bitsy Tricolor Challenge
Showing posts with label quilled. Show all posts

Tuesday, September 11, 2012

Quilled Miniature Wedding Cakes

Hello All,

These days I am lined with the humongous task of making my 'Inventory List' of all the craft things I possess, just to have an idea of what all I already have before making a purchase and it is soooo tiring!! Believe me!! Noting down every teeny weeny thing I possess is freaking me out a bit..So I decided to unwind and this is what I came up with...part experimenting..part utilizing stuff in stash...

So I had a couple of 5 mm Quilling strips pre cut packs lying with me.. Since I mainly use 3 mm shredded quilling strips for all my general quilling, I have been toying with soo many ideas to use these strips and finally came up with these-

Quilled Miniature Wedding Cakes-
I made 4 in total using almost 200 strips. The bases were easily done.. Decorating them differently was a challenge though...
That's a blueberry flavored icing cake with glazed and plain cherries. A fondant red heart on the top makes it perfect :)
This is one is my favorite and the first of the lot. I simply loved the buttery hues of this cake and the shaded pink roses seemed just perfect for it. With the added pearls, I simply adore this little one :)
With different shades of red and maroon icing, this cake is the brightest of all and I have covered half side with white roses and half with pearl and rhinestone embellishment to give it a vintagy yet fancy look at the same time.
This cake was a little out of the box. May not look like a traditional wedding cake (sans the tiers) but I nevertheless enjoyed making this one as well.
I have included a steel ruler to give an estimate of the sizes of the cakes. The box in which I have kept these cakes is little over than 3" tall and the cakes are somewhere between 3 cm and 4 cm.

I had a fab time making those. Please do let me know if you like them and if you have any suggestions/ comments to help me improve my work, then I would certainly love to hear them. 

Thanks for dropping by.

Just Love Crafts xx

Saturday, September 1, 2012

Tricolor Quilled card *UPDATED*

Hello Everyone,

This morning I posted another self framed shadow frame in the series and here is my second post in the row. 
This card is totally inspired by Itsy Bitsy's tricolor challenge. I have been thinking about making it since the moment I saw the challenge..which was about 10 days back but look at the odds of me participating in this challenge. I am entering my card just when its 2 hours to the deadline...:P :P
No No, I am not feeling proud about it..Just the last moment habit has seem to stuck and it will just not go.. Sigh!!
Have a look-

Do let me know how this card is. Though I am totally thrilled about the interesting and of course much patriotic challenge, but more than the challenge it was the theme that really pushed me to make this card. I somehow wanted to quill something in Indian Flag Tricolor combo but never really got a chance to do so. Even though Independence Day is long gone, I didn't want to lose a chance to make something that connects me to my beautiful country.
I am so glad and kind of satisfied that Itsy Bitsy came up with this challenge.

So, I have used Only and Only the 'tricolor' colors to make this card and I am glad the way its turned out.

Linking up to Itsy Bitsy Challenge here.

Details of materials used - 
This card is completely made of paper apart from the little ribbon which is a piece of a satin ribbon I had recycled. (From an old Indian Rakhi)
All the paper I have used for this creation is from the collection I bought from India when I moved to Singapore (Yes!! I did carry my paper collection here :P)

*UPDATE* - Yayyy!! We won!!! This card has been selected as one of the winners of this challenge!! So happyyyyy!!!! :D :D

Thanks for dropping by.
Just Love Crafts xx

Friday, August 31, 2012

Self Framed Shadow Box for Quilling - 2

Hello,

I hope you all remember my previous post about the framed shadow box for your precious quilled creations. For those who haven't seen it so far, you can find it here.

This is the second one in series I have prepared and is smaller than the other versions. 
Here it is - 
I have used an A4 size sheet to make the shadow box. The reason it appears smaller than the others is that the width of this frame is more than the other boxes I have made and is perfect to hold a pretty 3-D petal quilled flower.

The 'frame' is made up using a polka dot patterned paper from Primary Basics scrapbook paper collection.
I have added a little punched daisy flower made from a daisy craft punch with a rhinestone for that teeny weeney hint of bling (I seem to love a blingy effect on my creations! :P).
Here is a close up of my quilled flower. You can see a hint of bling here too :P. The flower has protected it well enough by the faux glass frame made from an acrylic sheet (OHP) and the patterned paper.
Simple and Effective??

Hope you like it. I will be uploading more shadow box frame designs with quilling inside. Keep checking the blog.

Linking it to the following challenges - 
1. Do More with Less 
2. Lulupu - The craft Lounge
Thanks all,
Just Love Crafts xx

Monday, August 20, 2012

A Very Special project - Framed Card for a Wedding!!

Dear All,

I am really excited to show you this very very special project of mine. How is this special? Well, there are a number of reasons for that. 
Firstly, it was my very first commissioned order in Singapore. 
Secondly, This is the first time I made something like this. 
Thirdly, I had a total of 24 hours, that is one day to make this (including designing, framing, delivering.... everything). 
And finally I was actually successful in it as my client was very very happy which is what that made the whole process worthwhile. :)

Here it is, my first project of its kind-
Framed Final Version
It is an A4 size framed card to be gifted on a wedding. I was not sure if I will be able to manage everything in one day but I am glad it worked out as it has really given me that extra dose of confidence that I know I can accept a challenge like this again as well.
Unframed Version
It was very difficult to picture the framed version in the normal circumstances and even the unframed version couldn't be captured properly due to the shimmer of the background paper. But I was totally in love with this project and took loads of pictures. Of course can't put all, so here are a few more :) :) :)-
Wedding Rings
 My client wanted Doves, heart, rings, wine red and purple color and the messages to be written in both English and German so it gave me a fair idea of what all 'has' to be there. Now the task was to set up everything neatly and in a way that none of the component gets overshadowed by another.
Heart to be the main focal point and should be between the doves
 They wanted the word 'Jaaaaa!' in the heart. :)
The border
I did the borders at the very last moment. I was damn unsatisfied that being a wedding gift it got to be special and nice and nothing was clicking. Finally, during my brief sleep spell something clicked and I made the border as soon as I got up. (Subconscious mind does help!! :P)
Niki- The Groom
Our very handsome groom :)
Nora- The Bride
Pretty pretty bride with a beautiful necklace.
One last shot
This was taken a minute before it went to its new owner. I was kinda sad as I knew I might not see it again. It flew to Germany the very same night. The 24 hours I spent making were certainly stressful, not because I could not make it, but because I wanted to make them perfect. 
However, I do realise that perfection is not easily achieved and it does have its share of flaws but the happiness I saw on the faces who took this away was more than perfect and that just made this perfect.

P.S -Though I am the maker of this entire project, I wish to express my thanks to all my amazing contemporary crafter friends who have always shared their awesome creations inspiring each other in more than one ways. Thank you all very much :)

Lots of love :)
Just Love Crafts xx

Tuesday, August 14, 2012

Quilling Shape Beginner's Chart

Hello everyone,

Ever since I began taking workshops in Singapore,I had a hard time explaining and making basic shapes and I did not want to waste time making them also every time. So I came up with an extremely simple yet effective chart for basic quilling shapes. I know its not comprehensive but it was all I could fit on an A-4 size sheet. Here it is - 
I enjoyed making its border a lott...It took my one friday evening and little bit of Saturday morning to finish the border and it took about 140 coils.
I framed this chart in an A4 size frame almost immediately so that I can show it to my students every time without it getting damaged..we all know how fragile quilling can be.. :)
Please do let me know how it is. Your comments are always appreciated :))

Thank you all.
Just Love Crafts xx

Candy Land card!

Hello All,

I made this card just like that. I somewhat wanted to make something which looks like candies and when I assembled the whole card it gave me a feel of a candyland. Lol!!
So here it is-
This card gives such a sunny, cheerful look that I made it apparent in the sentiment. The sentiment is hand written. The 'candies' are quilled circles of various shades.
The other supplies used for this card are patterned papers from assorted collections and a valentine theme twine from doodlebug.
Some more pics-
Do lemme know if you like my candy card or not..:D

Thank you all!
Just Love Crafts xx

Wednesday, July 11, 2012

Another two tone card!!

Hello everyone,


Presenting another two tone card after the first one in shades of pink n purple..I have tried a bolder combination this time...here it goes...
I am enjoying making two-tone cards a lot, however thinking of a generic color theme which will go with my kind of designing takes a bit of experimentation for me..but guess its just me..
I feel this card will go well for both genders...kinda 'HOT' combination...:D
Do tell me your views about this card.... :) :)
Just Love Crafts xx

My first Beehive card for a first anniversary...:)

Heya all,


I was never confident of trying Beehive technique as such before for one project..I used to try making swirls with some leftover strips to get a knack of it..but this is my first project using this technique as such...Of course all thanks to Susan and Pritesh for inventing and promoting this technique...:) :)


Well, I wanted to make a card by incorporating quilling technique at the same time make it for the 'first' anniversary event...so I decided on making a big number '1' as the main motif on the card and simply added some patterned paper, ribbon and sentiment to it.
The beehive swirls I have pasted here are the ones I made during my practice and hence the assortment of colors and neatness in swirls.. :P
I tried to incorporate my friend's favorite color as the main backdrop and hence the purple color background, but plain purple was looking very odd, so to spice up the whole thing, I added a piece of gingham red pattern paper..
 I am not sure how it has come out...yet to hear from my friend as she hasn't received it so far...
But please do let me know your comments/ views about the card...it helps me to improve :)


Loads of love..
Just Love Crafts xx

Thursday, July 5, 2012

A flowery card

Hello,


This card was made for my hubby's colleague and friend of mine :). I asked her, her favorite colors and she told me - hot pink and cyan.
Both the colors are bright and cheery and I had to figure out a way to make both the colors stand out..this is what I came up with..
I know the stem is a little offset :( :(
Its a result of my impatience with my creations..but I loved the look of daisies.
The flowers look nice but I am really not liking the stem.. :(
please do let me know your views about the card.. It will help me do better :)
Love all
Just Love Crafts xx

Two tone card 1

Hello All,


Today I am in a mood for posting. This is my fourth post in a row and I am happy but touchwood before I get jinxed again and I stop posting for another month :P
I have been pondering over making two tone cards in Quilling for very long but never really put the idea on paper. But one evening, while randomly sorting out my paper stack, I saw these lovely girly complementary colors and I had to make something using both of them as main colors.
Anyways,
Let the pictures do rest of the talking..:P
Though we took dozens of pictures, I can't possibly put them all up :p. So putting just a few...

As usual, nothing fancy or elaborate, just a simple post with my simple creation. Comments welcome :)
Just Love Crafts xx

Flourish!!

Hello friends,


The card I am presenting today is very special to me. Not that I have special sentiments to it, I am sentimental about all my creations anyway :P. I didn't know how it will turn out to be when I started it because I was making it from scrap strips. Remember in my older posts, how I started quilling after coming to Singapore with only 3 colors (red, pink and blue) of shredded strips and this project was supposedly a left over kinds. But on completion it looked pretty much wholesome and nice!!
I don't have much to write about it. Just loads of pictures to share...My sweetheart photographed it nicely for me and I am sharing the ones I liked..

Its a very simple, no fuss, happy go lucky card and I really love it...
Hope you like it.
As always your precious comments will tell me that...Do let me know how it came out..
Love all
Just Love Crafts xx

Thursday, May 31, 2012

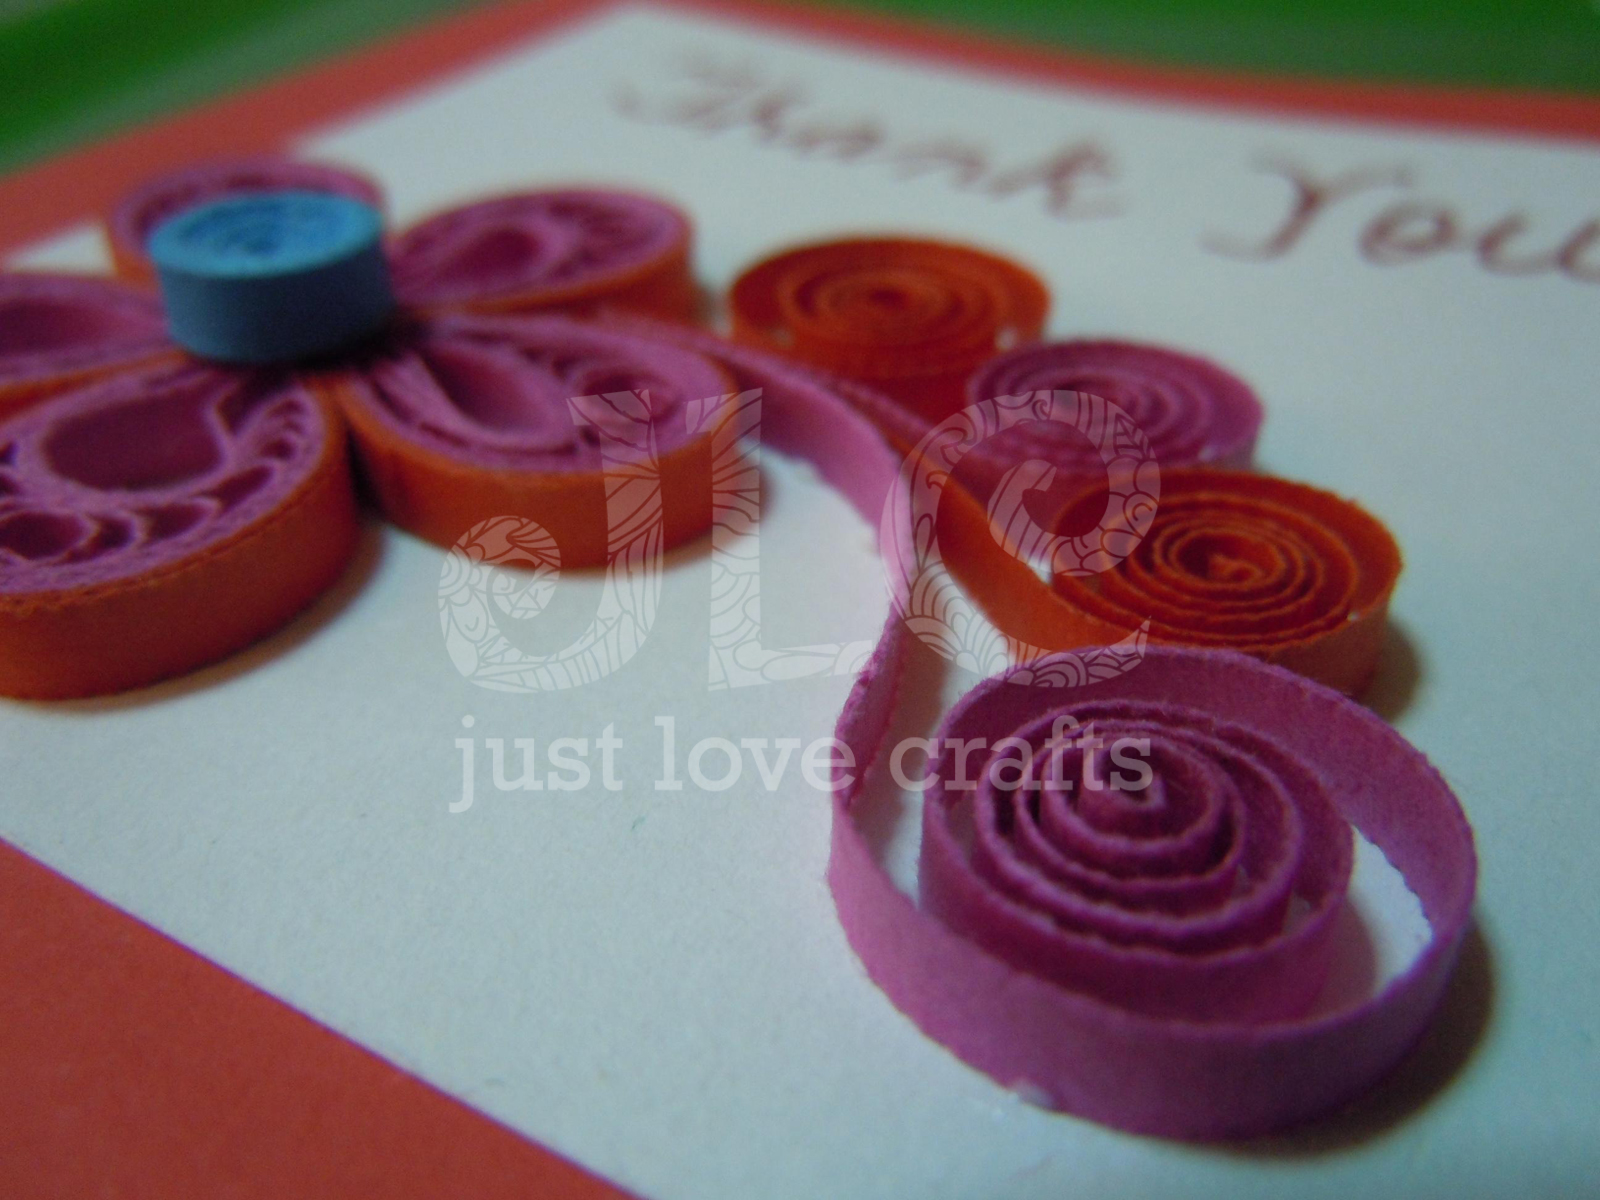
A small Thank you card!!

Hey everyone,

I am back again right in the morning to post about this small cute card I made 2 weeks ago to express our 'Thanks' to a friend for his kind invitation. :D
More or less, since I have come to Singapore, I doubt I have left any occasion without adorning it with my quilled and crafty creations. So here it goes-
 This card has been made within 10 minutes and I am patting myself for that..NO No! not coz I made the 'entire' card in 10 minutes, but because I have kept a bunch of pre made flowers with me which I make every now and then and which come very handy whenever I have to conjure a quick card. 
So really, this card was made with the help of my already made flower motif. 
 These ascending swirls were totally a last minute addition. I had earlier planned to stick the flower and write 'Thank you very much' in the remaining space, but don't know what clicked in my head that I added this bunch of swirls and I totally loved the effect it gave to the entire setting..^_^
I am sure someone who has read my previous posts must have noticed the use of these 3 colors 'only' before as well. As I earlier mentioned, I had shredded like these 3 colors and wanted to use them a bit before stocking more color strips and so only 3 colors have been used so far.
Its not very fancy or bold and big but serves the purpose well enough..:D


Thank you for looking and as always, your comments are always welcome.

Just Love Crafts xx

A very orangy birthday card!!

Hello all lovely people,


Today I am bringing you my first card which I made after coming to Singapore. The card is now with my husband's colleague, a very lovely American girl who absolutely loved the card and that is I believe is the most important thing, appreciation of the receiver..Ryt!!!


However, the flower used in the card was pre-made. I made it in India while I was waiting for my visa to get approved and I can be united with my hubby. :)


Don't have many pics, but whatever I took on and off, I am posting here..
 I used 3 varying colors of yellow and orange and joined them together.  
 The resulting flower.
 The flower was lying with me for almost 2 months when I thought of this card and I was pleased with the result. The colors were of course much brighter and prettier than what camera could capture.
I love the effect silver pen has on black background. I guess I'll use this style more often. :D
Anyways, I didn't write much for this flower as I am way too sleepy. I was literally falling over laptop while writing but had to finish this. Please do leave me your valuable comments/ suggestions. Its much needed.. :D


Love,
Just Love Crafts xx

Similar Posts

Related Posts Plugin for WordPress, Blogger...