

Hello,
This is something I made long time back, when I was in India waiting for my Singapore visa...This is a very simple but very efficient idea of making your own twine used in crafting. I was hunting online for best deals on twines (Baker's twine, Doodle twine or any brand) when I actually bumped into a tutorial which was on making your own twine. I saw the tutorial but didn't make it for a while. Much to my dismay that when I went back to search for the same tutorial I couldn't find it, but it was such a great idea that I had to share it with my crafty friends.
And hence I decided to make my own following that mystery tutorial..:)
You need very basic things to make your own crafting twine-
A spool of thick cotton thread,
An old wide ruler,
Scissors,
Permanent markers in assorted colors.

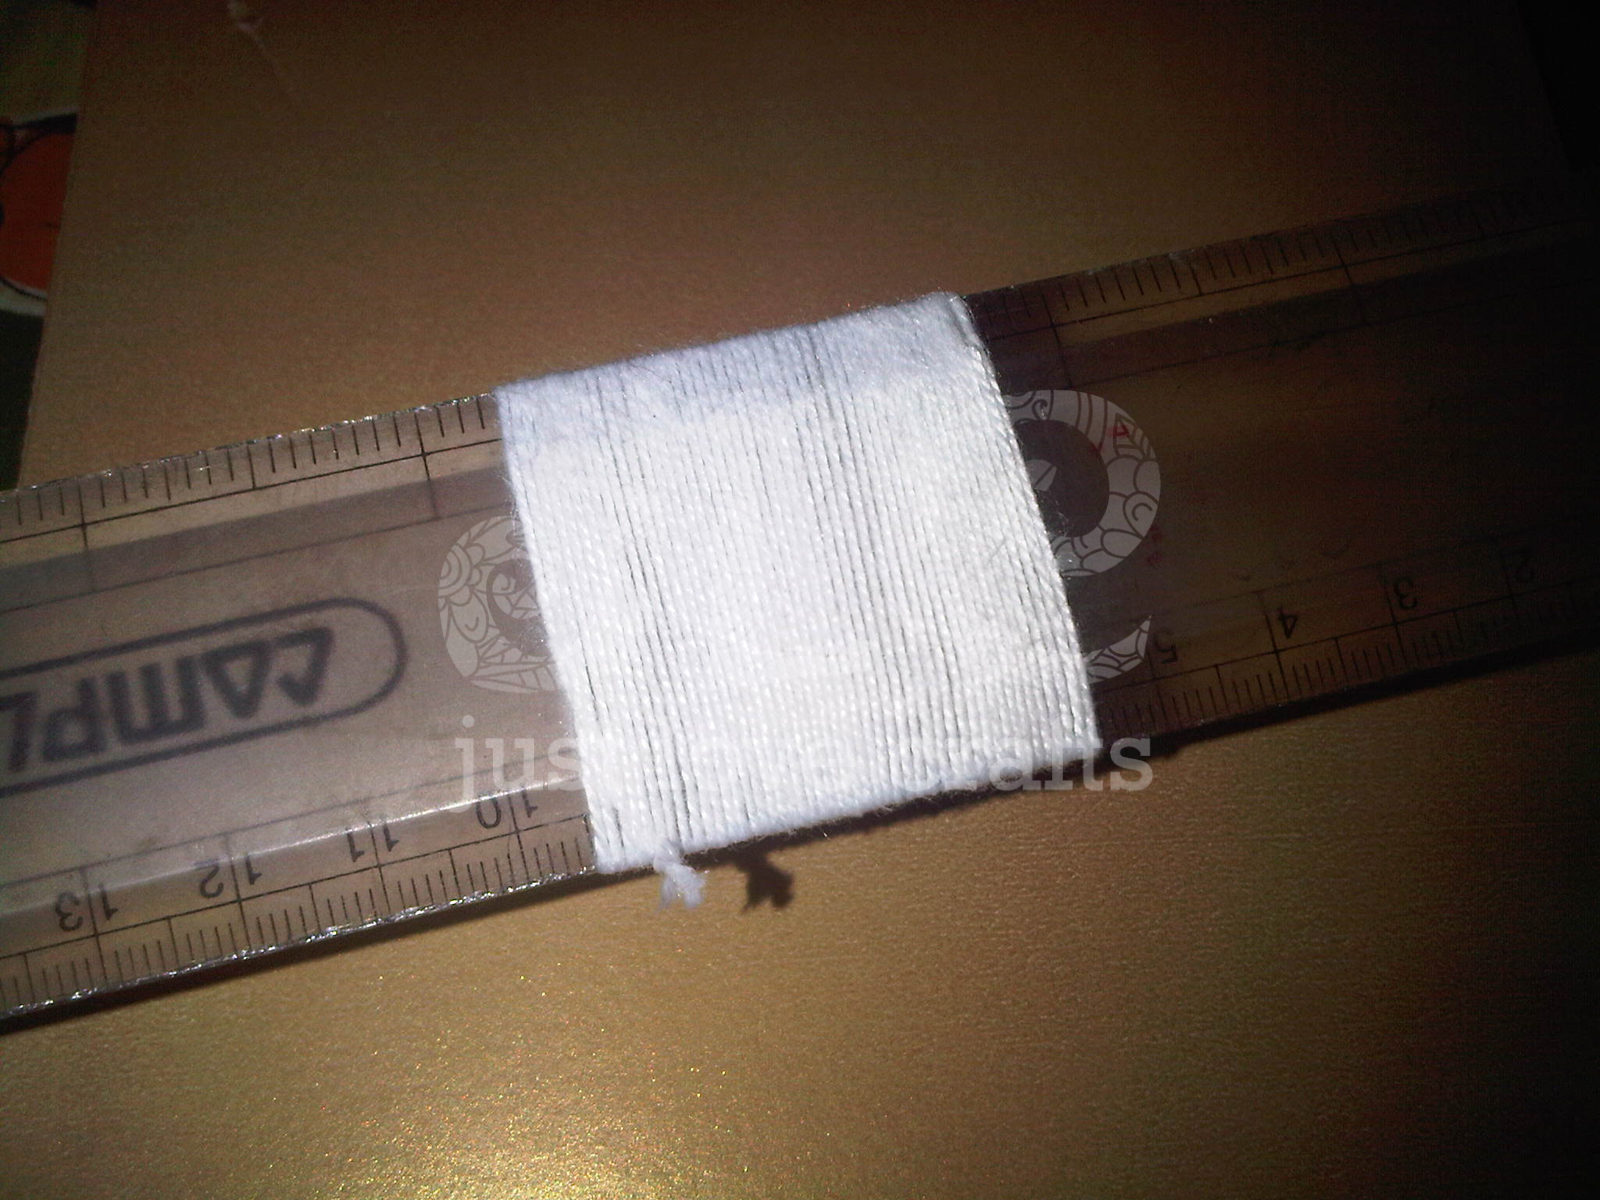
 Measure a length of cotton thread (eg. 2 yards) or whatever length you need for your crafting project and cut it off. Wrap the whole thread tightly on an old ruler like this. Click on the picture to see closely.
 After the thread is tightly secured on to the rules, take permanent marker of any color and start drawing lines diagonally (you can do straight as well but straight lines end up in diagonals anyway!). Make sure that that you make the lines with a slow and steady pace and allow enough time for the ink to penetrate the thread.
 Make such lines on both sides. Keep it for a minute so that any wet ink will be soaked by the thread and the thread will be completely dried.
Start unrolling the thread slowly and see your handmade twine collecting in front of you.
 I made it in two colors.
 But unfortunately, before I could use it for any project, I got my visa and I started preparing for my departure. And in the rush of packing and reaching Singapore I left my twines in India only :( :(
Will collect them once I go back and will definitely use them for something.
But you can make it and use it for sure..This will specially help all the twine lovers. The whole spool hardly costs anything and all you need is a permanent marker in the color of your choice and you are good to go. :)
Please do let me know how you found this tutorial. Would love to get some reviews. :)
(Disclaimer- As previously mentioned, it is an inspired tutorial, NOT my brainchild. Did it for my crafty friends :) :))
Just Love Crafts xx
This is something I made long time back, when I was in India waiting for my Singapore visa...This is a very simple but very efficient idea of making your own twine used in crafting. I was hunting online for best deals on twines (Baker's twine, Doodle twine or any brand) when I actually bumped into a tutorial which was on making your own twine. I saw the tutorial but didn't make it for a while. Much to my dismay that when I went back to search for the same tutorial I couldn't find it, but it was such a great idea that I had to share it with my crafty friends.
And hence I decided to make my own following that mystery tutorial..:)
You need very basic things to make your own crafting twine-
A spool of thick cotton thread,
An old wide ruler,
Scissors,
Permanent markers in assorted colors.


Start unrolling the thread slowly and see your handmade twine collecting in front of you.


Will collect them once I go back and will definitely use them for something.
But you can make it and use it for sure..This will specially help all the twine lovers. The whole spool hardly costs anything and all you need is a permanent marker in the color of your choice and you are good to go. :)
Please do let me know how you found this tutorial. Would love to get some reviews. :)
(Disclaimer- As previously mentioned, it is an inspired tutorial, NOT my brainchild. Did it for my crafty friends :) :))
Just Love Crafts xx


this is kool :)
ReplyDeleteAWESOME idea Neha! I don't usually use twine for the reason that often I don't get the type I want! This is a terrific idea :)
ReplyDelete